


how to apply screen protector iPhone 17
Unboxing Your iPhone 17 Screen Protector: What's Inside (and What's Not)
Your iPhone 17 deserves protection that actually sticks around. Most quality protectors come with the basics: the glass shield, a microfiber cloth, and an alignment tool. Here's what separates the pros from the "oops, I messed up again" crowd.
The Essential Toolkit: What You Should Find
A decent screen protector kit includes dust removal stickers, wet and dry cleaning wipes, and an installation frame or guide. The alignment tool isn't just fancy packaging. It's your best friend for getting that edge-to-edge fit. Some brands throw in extra alcohol wipes because they know you might need a do-over.
Beyond the Basics: Why Your Case Choice Matters
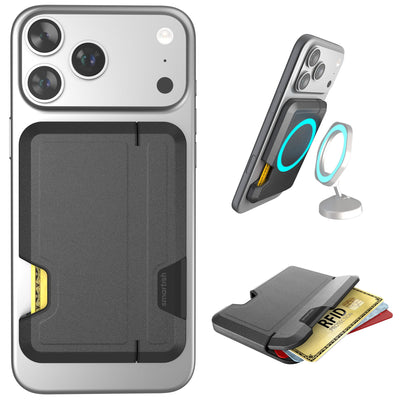
Screen protectors work best when paired with a case that actually makes sense. The Gripmunk Clear with MagSafe for iPhone 17 Pro shows how thoughtful design beats generic options. Case features and compatibility vary by model, so confirm the details on the product page before buying.
Why Every Tool Has a Job
Each piece serves a purpose. Dust stickers grab particles your cloth missed. The alignment guide prevents crooked installation that'll bug you every day. When you're learning how to apply screen protector iPhone 17 properly, these aren't extras. They're necessities disguised as accessories.
Screen Prep: Where Most People Either Nail It or Need a Second Protector
Getting your iPhone 17 ready is where success happens. Clean your hands first. Oils transfer to everything you touch. Power down your device and find good lighting. Overhead kitchen lighting won't help when you're hunting dust specks.
Dust-Free Zone: Your New Obsession
Start with the alcohol wipe, working top to bottom in overlapping strokes. Follow with the dry cloth using the same pattern. Work in a bathroom after a hot shower. Steam settles airborne particles. One speck of dust creates a bubble that'll annoy you for months.
The Hover-and-Align Trick
Position your alignment guide before removing any adhesive backing. Line up the speaker cutout and camera area first. These are your reference points. Hold the protector about an inch above the screen and double-check that all edges match the phone's borders. Alignment happens before contact.
Case Compatibility: Don't Let Your Case Ruin Everything
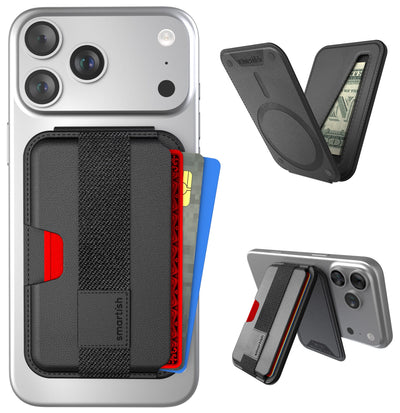
Not all cases play nicely with screen protectors. Test-fit your case after installation to avoid edge lifting. If you use a case with tight front edges, choose a protector labeled case-friendly. For maximum protection, pair your screen protector with a reliable iPhone 17 Pro case with MagSafe compatibility.
The "Go Slow or Go Home" Application Method
Time for the main event. Remove only the bottom backing tab. Don't peel everything at once. Start the protector at the top edge, using your alignment guide as reference. The goal isn't speed; it's precision. One smooth motion beats three rushed attempts.
Lower It Like You Mean It
Lower the protector gradually, letting adhesive contact happen naturally. Don't press down until you're certain about placement. If bubbles form during application, stop and lift slightly. Most quality protectors allow repositioning within the first few seconds. Work from center outward with firm but controlled pressure.
Bubble Trouble? Here's Your Arsenal
Small bubbles usually work themselves out within 24 hours. Large ones need intervention. Use your microfiber cloth or the included squeegee, pushing bubbles toward the nearest edge. For stubborn air pockets, lift the protector slightly and reapply. Bubbles become minor inconveniences rather than disasters when you know what you're doing.
Pro Tip: Temperature matters. Cold protectors are harder to work with and may crack during installation. Let your kit reach room temperature before starting.
Edge Patrol: The Final Check
Run your finger along all edges, making sure everything's stuck down. Check for lifting corners. They collect dust and can fail over time. Your screen protector should feel nearly invisible once installed. If you want to learn more about how MagSafe technology works with modern iPhone accessories, understanding magnetic alignment helps with both case and protector selection.
Keeping Your Screen Protector Happy Long-Term
Your protector isn't maintenance-free. Regular cleaning prevents buildup that makes your screen look cloudy. Use gentle motions with a microfiber cloth. Skip harsh chemicals or abrasive materials that create micro-scratches.
Post-Drop Inspection Protocol
Check for cracks immediately after any significant drop. Small chips at corners are usually cosmetic, but spiderweb patterns mean replacement time. A cracked protector still offers some protection, but compromised adhesion lets dust underneath. Don't wait once damage is visible.
Weekly Cleaning Routine
Slightly dampen your microfiber cloth with distilled water. Tap water leaves mineral deposits. For stubborn fingerprints, use isopropyl alcohol sparingly. Clean in straight lines rather than circles to reduce streaking. Proper maintenance makes the initial effort worth it.
When to Start Fresh
Edge lifting, persistent cloudiness, or multiple impact points signal replacement time. Don't push a damaged protector beyond its limits. A failing protector provides false confidence and may let debris scratch the glass beneath. For comprehensive device protection, check out the best iPhone case options to safeguard your investment.
Frequently Asked Questions
What tools come with an iPhone 17 screen protector kit?
Most quality iPhone 17 screen protector kits include the glass shield, microfiber cloth, alignment tool, dust removal stickers, and wet/dry cleaning wipes. Some brands add extra alcohol wipes because they know you might need a do-over. The alignment tool isn't just fancy packaging - it's your best friend for getting that edge-to-edge fit that looks professional.
How do I prepare my iPhone 17 screen before applying the protector?
Clean your hands first, then power down your device and find good lighting. Start with the alcohol wipe, working from top to bottom in overlapping strokes, then follow with the dry cloth using the same pattern. Use those dust removal stickers like you're defusing a bomb - one speck of dust can create a bubble that will annoy you for months.
What's the best technique for applying an iPhone 17 screen protector?
Remove only the bottom backing tab and start the protector at the top edge using your alignment guide as reference. Lower the protector gradually, letting adhesive contact happen naturally - don't press down until you're certain about placement. Work from the center outward with firm but controlled pressure, and remember that one smooth motion beats three rushed attempts every time.
How do I fix bubbles after installing my iPhone 17 screen protector?
Small bubbles usually work themselves out within 24 hours, but large ones need intervention. Use your microfiber cloth or included squeegee to push bubbles toward the nearest edge. For stubborn air pockets, lift the protector slightly and reapply - most quality protectors allow repositioning within the first few seconds.
Why should I check case compatibility with my iPhone 17 screen protector?
Not all cases play nicely with screen protectors, and tight front edges can cause corner lifting later. Test-fit your case after installation to avoid edge lifting issues. If you use a case with tight front edges, choose a protector labeled case-friendly to reduce the chance of problems down the road.
How do I maintain my iPhone 17 screen protector after installation?
Your protector isn't maintenance-free - regular cleaning prevents buildup that can make your screen look cloudy. Use gentle motions with a microfiber cloth and avoid harsh chemicals or abrasive materials that can create micro-scratches. Weekly deeper cleaning with slightly dampened microfiber cloth helps maintain clarity, and for stubborn fingerprints, use isopropyl alcohol sparingly.
When should I replace my iPhone 17 screen protector?
Inspect for cracks immediately after any significant drop - small chips at corners are usually cosmetic, but spiderweb patterns mean replacement time. A cracked protector still offers some protection, but compromised adhesion can let dust underneath. Don't wait to replace it once damage is visible, as compromised protection defeats the purpose.