


Key Takeaways
- Use J-channel trays that are 2-4 inches wide for standard desktop cable management setups.
- Mount the trays 18-24 inches below your desk surface for optimal cable accessibility.
- Secure the trays with heavy-duty Velcro strips rated to hold over 10 pounds.
- This setup maintains a clean aesthetic that enhances focus at your workspace.
Table of Contents
- Why Tangle-Free Desks Rule Your Workflow
- What Desktop Cable Management Really Means (And Why It Matters Now)
- Step-by-Step: Organize Your Desk Cables in Under 30 Minutes
- Under-Desk Cable Management: Hide the Mess for Good
- Desktop Surface Organizers: Keep Cables Where You Work
- Smart Comparisons: Clips vs. Trays vs. Boxes vs. Sleeves
- Advanced Techniques: Bundling, Labeling, and Power Optimization
- Problem Solvers: Fix Tangled, Tripping, and Frayed Cable Chaos
- Maintenance and Upgrades: Keep It Clean Long-Term
- Best Desktop Cable Organizers for 2026: Quick Picks by Setup
- Future-Proofing Your Desktop Cable Management
Why Tangle-Free Desks Rule Your Workflow
Messy cables steal 10-15 minutes daily in frustration hunts, turning simple device swaps into archaeological digs. Desktop cable management means organizing power cords, data cables, and chargers on and around your desk for clutter-free function, transforming chaos into a system that works with you, not against you.
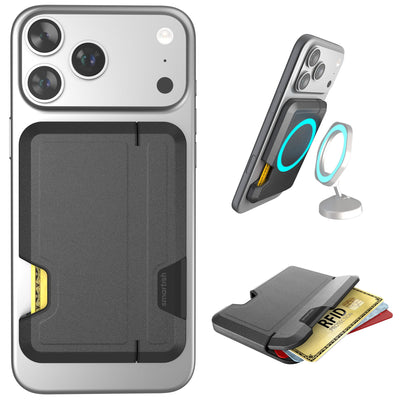
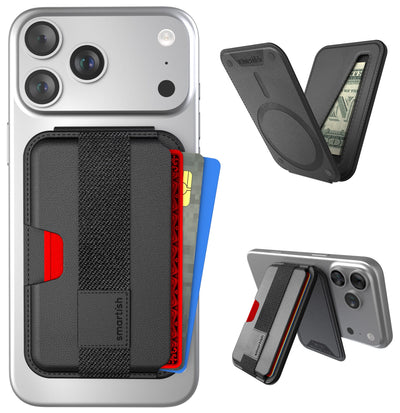
The payoff hits immediately: sharper focus, better airflow (up to 20% cooler devices), and zero safety hazards from floor tangles. This guide delivers step-by-step setups, smart comparisons between clips versus trays, and advanced bundling techniques that work whether you're running a single laptop or a multi-monitor command center. For those seeking a simple, magnetic solution to keep cables in place, the Bigger Cable Wrangler is a top choice for taming even the messiest setups.
For anyone looking to bundle and conceal multiple cords, the Cable Collar offers a flexible, easy-to-install sleeve that keeps your workspace neat and organized.
What Desktop Cable Management Really Means (And Why It Matters Now)
Desktop cable management focuses on personal workspace organization, aesthetics plus practical function, unlike data center cable management that prioritizes scale and security. The goal: create clean pathways for power and data while maintaining easy access for daily device swaps and adjustments.
The benefits compound quickly. Tidy spaces boost productivity by 15% through reduced visual distractions, while proper cable routing extends cable life by preventing stress fractures and kinks. Better airflow around devices prevents 5-10°C overheating, especially crucial for laptops and gaming setups that generate significant heat.
2026 brings fresh urgency with hybrid work setups and the iPhone 17's expanded USB-C ecosystem creating more device interconnections than ever. Multi-monitor workstations, wireless charging pads, and constant device switching demand systems that adapt without becoming tangled disasters. For more on how the latest Apple devices impact your setup, check out this iPhone 17 guide.
| Component | Purpose | Best For |
|---|---|---|
| Cable Clips | Single cable routing | Desk edges, daily-use cords |
| Under-Desk Trays | Bulk storage/hiding | Power strips, permanent cables |
| Velcro Ties | Bundling groups | Temporary setups, frequent changes |
| Cable Sleeves | Clean bundling | Multiple cables, permanent runs |
| Cable Boxes | Hide power strips | Safety, dust protection |
Step-by-Step: Organize Your Desk Cables in Under 30 Minutes
Prep Phase (5 Minutes)
Unplug everything and remove unused cables, that old HDMI from 2019 isn't coming back. Measure remaining cable lengths and identify excess; you want 6-12 inches of slack maximum for flexibility without loops creating dust traps or visual clutter.
Bundle Phase (10 Minutes)
Group cables by type: power cords together, data cables together, charging cables in their own bundle. Twist each group loosely, no tight spirals that stress the wires, and label with removable tape. Write "Monitor HDMI," "Laptop Power," or "Phone Charger" for instant identification during future swaps.
Route Phase (10 Minutes)
Start with desk edges using 1-inch adhesive clips every 6 inches along the back and sides. Thread bundles through clips, then route behind your monitor by threading cables through gaps in the monitor stand or arm. This creates the cleanest visual lines while maintaining access.
Finishing Touches (5 Minutes)
Use pea-sized adhesive dots for clip mounting, they hold up to 5 pounds and peel clean when you rearrange. Roll any remaining excess into 2-inch loops and secure with small Velcro ties. Test airflow around devices by feeling for warm spots that might indicate blocked ventilation.
For gaming desks with 8+ cables, prioritize GPU power cables first since they're thickest and least flexible. Route them along the most direct path to avoid interference with other components.
Under-Desk Cable Management: Hide the Mess for Good
Under-desk solutions free 20-30% of surface space while eliminating tripping hazards, crucial for active workspaces. The key lies in creating accessible vertical storage that doesn't interfere with leg room or chair movement, especially important for sit-stand desk users who adjust height regularly.
Mount your power strip 18-24 inches below the desk lip using two heavy-duty Velcro strips rated for 10+ pounds. This positioning keeps outlets accessible while hiding the visual bulk. Choose a J-channel cable tray 2-4 inches wide, then screw or zip-tie it to your desk frame, installation takes 5 minutes and handles 5-10 cables easily. For a complete kit to tackle cord chaos, try the Cord Essentials Bundle which includes everything you need for a streamlined setup.
For standing desks, angle trays at 45 degrees for easier reach during height adjustments. Fold-down cable baskets offer the best access for setups you modify every few weeks, while vertical sleeves work better for permanent installations where 1.5-inch diameter tubing can hide up to 6 cords invisibly.
- Maximum surface space recovery
- Eliminates floor tripping hazards
- Better dust protection
- Perfect for sit-stand desks
- Requires drilling or strong adhesive
- Less accessible for frequent changes
- May interfere with knee space
Choose J-channel trays sized 2-4 inches wide for standard setups. Mount 18-24 inches below your desk surface using heavy-duty Velcro strips rated for 10+ pounds. This positioning keeps cables accessible while maintaining that clean aesthetic that boosts focus.
For standing desks, angle your tray at 45 degrees to prevent cables from sliding when you adjust height. Thread power cords first, then data cables, leaving 6-inch service loops for easy device swapping without complete rewiring.
Desktop Surface Organizers: Keep Cables Where You Work

Surface organizers excel when you need daily cable access, perfect for swapping peripherals or charging devices within arm's reach. Unlike hidden solutions, these keep your most-used connections visible and ergonomically positioned under 12 inches from your primary work zone.
Cable channels dominate this category. Install 1-inch wide adhesive-backed channels along your desk edge, cleaning the surface with alcohol first for maximum grip. Press 4-inch segments every 8 inches, they set in 60 seconds and route 4-6 cables seamlessly along your workspace perimeter.
Finger-groove clips handle single cables that need frequent unplugging. Unlike basic clips that pinch, grooved versions grip without damaging cable jackets. Position them every 6 inches along high-traffic areas where you regularly connect phones, external drives, or gaming controllers. If you're interested in more options for keeping your desktop tidy, explore this guide to the best desktop accessories for productivity and organization.
Smart Comparisons: Clips vs. Trays vs. Boxes vs. Sleeves
Each desktop cable management solution excels in specific scenarios. Clips win for speed and single-cable control, installing in under 2 minutes with simple adhesive backing. Trays dominate volume management, bundling 10+ cables in organized baskets that slide under your desk.
| Solution | Best For | Install Time | Cable Capacity | Adjustability |
|---|---|---|---|---|
| Cable Clips | Single cable routing | 2 minutes | 1-2 cables | Fixed position |
| Under-Desk Trays | Power strip hiding | 10 minutes | 8-12 cables | Height adjustable |
| Cable Boxes | Power strip protection | 5 minutes | 4-6 outlets | Ventilation slots |
| Cable Sleeves | Bundle organization | 3 minutes | 6-10 cables | Cut to length |
Boxes versus trays comes down to safety versus airflow. Fire-safe boxes protect power strips from dust and accidental contact, while open trays provide 10% better cooling through unrestricted airflow, crucial for high-wattage gaming setups.
Material choice impacts longevity. Velcro ties adjust 50+ times without losing grip, making them ideal for evolving setups. Zip ties offer permanent solutions but require cutting for changes, reserve them for final installations where cables won't move for months. For a magnetic solution that keeps your most-used cords at your fingertips, try the Cable Wrangler - Magnetic Cord Organizer for effortless desktop cable management.
Advanced Techniques: Bundling, Labeling, and Power Optimization
Professional desktop cable management starts with the sleeve method. Slide 1.25-inch braided tubing over 6-8 related cables, then cinch every 12 inches with reusable Velcro ties. This creates flexible bundles that move as units while maintaining individual cable access.
Heat-shrink labeling eliminates guesswork during troubleshooting. Slip 0.5-inch heat-shrink tubes over cable ends, add printed labels, then apply gentle heat for 10 seconds. Color-coding amplifies this system, red for power, blue for data, yellow for video connections.
Power optimization prevents overload and reduces heat buildup. Mount power strips using 3M Command hooks rated for 7.5 pounds, positioning them to limit daisy-chaining to 3 devices maximum. Upgrade to 20W USB-C hubs for modern devices like the iPhone 17, consolidating charging through single connection points that reduce overall cable count by 40%. If you need a high-speed charging cable for your latest devices, the Crown Joule - USB-C Fast Charging Cable is a reliable option for both power and data transfer.
Problem Solvers: Fix Tangled, Tripping, and Frayed Cable Chaos
Tangled cables respond to systematic sleeving combined with weekly maintenance. Bundle related cables in braided sleeves, then perform 2-minute shake tests weekly to identify developing knots before they become permanent. This proactive approach cuts untangling time from 15 minutes to under 2 minutes.
Floor tripping hazards disappear with proper elevation. Elevate cables using under-desk trays or adhesive clips to keep walkways clear and your workspace safe. For frayed cables, replace immediately, damaged cords are a safety risk and can impact device performance. Regularly inspect all cables for wear and swap out any with exposed wires or cracked insulation.
Maintenance and Upgrades: Keep It Clean Long-Term
Monthly maintenance takes 5 minutes but extends your setup's lifespan by years. Start with compressed air, 30 seconds of short bursts clears dust from clips and sleeves that would otherwise create friction and wear. Check tie tension monthly; over-tightened Velcro cuts into cable sheathing, while loose ties let cables drift back into tangles.
Quarterly cable inspections catch problems before they become hazards. Replace any cable showing more than 10% exposed wire or cracked insulation. Upgrade opportunities emerge naturally, when adding your iPhone 17, pre-route the USB-C path through existing sleeves rather than creating new cable runs. Photo your current setup before major changes; this 10-second step saves 20 minutes when recreating successful configurations. For more tips on keeping your cords tidy, see this article on the desktop cable holder and how it can simplify your workspace.
Best Desktop Cable Organizers for 2026: Quick Picks by Setup
Home office setups benefit most from ventilated cable boxes that hide power strips while preventing heat buildup. Look for 8x6-inch boxes with side vents and cord exit slots, they hold 4 outlets plus surge protection while maintaining airflow that keeps components 5-10°C cooler than enclosed alternatives.
Gaming desks demand under-tray solutions that accommodate RGB cables and frequent peripheral swaps. Adjustable-width trays (12-24 inch span) mount without drilling and flex with sit-stand transitions. Budget-conscious users get excellent results from clip multipacks, 10 adhesive clips plus 5 Velcro ties typically cost under $15 and handle most single-monitor setups. For a roundup of top-rated cable holders, check out this best cable holders guide.
2026 Compatibility Note: Ensure any organizer accommodates USB-C's thicker connectors and iPhone 17's updated charging requirements, older cable channels may be too narrow.
Standing desk users need tool-free solutions that adjust with height changes. Clamp-on trays with 12-inch depth provide access without permanent mounting, while flexible clips grip desk edges without scratching surfaces. Pair cable management with wireless peripherals to cut cable count by 40% while maintaining the organized aesthetic.
Future-Proofing Your Desktop Cable Management

Wireless technology continues reducing cable dependence, but power requirements actually increase as devices become more capable. Plan your desktop cable management system with 20% extra capacity, today's 6-cable setup may become 8 cables when you add monitors or upgrade peripherals. Modular organizers adapt better than fixed solutions as your tech evolves.
The shift toward USB-C standardization simplifies cable types but doesn't eliminate desktop cable management needs. Power delivery cables carry higher wattage and generate more heat, making proper spacing and airflow even more critical. Smart cable management now prevents both tangling and thermal issues that could damage expensive devices.
Investing 30 minutes in proper desktop cable management pays dividends in daily productivity, device longevity, and workspace aesthetics. The techniques outlined here, from basic bundling to advanced under-desk routing, transform chaotic cable sprawl into organized, functional systems that support rather than hinder your work. Start with the step-by-step basics, then add advanced solutions as your setup grows more complex.
Frequently Asked Questions
What are the most effective tools and accessories for desktop cable management?
J-channel trays, cable clips, reusable zip ties, and cable sleeves are top picks for keeping cables neat and accessible. For magnetic solutions, products like the Bigger Cable Wrangler help hold cables in place, while Cable Collars bundle multiple cords into a tidy sleeve.
How does proper cable management improve workspace productivity and device performance?
A tidy desk reduces visual distractions, boosting productivity by up to 15%. Proper routing prevents cable stress and kinks, extending cable life, and improves airflow around devices, which can keep them up to 20% cooler during use.
What are the recommended placement and installation tips for under-desk cable trays?
Mount J-channel trays 18-24 inches below the desk surface for easy cable access. Use heavy-duty Velcro strips rated for over 10 pounds to secure trays firmly, keeping cables organized without sacrificing accessibility or aesthetics.
How can I quickly organize my desk cables in under 30 minutes following the step-by-step method?
Start by unplugging and sorting cables, then bundle similar cords with reusable zip ties and label them. Mount J-channel trays under your desk to route cables neatly, and use clips or sleeves on the desktop surface to keep cables where you work, transforming your setup fast and clean.