





iPhone 17 screen protector bubble free install
iPhone 17 Screen Protector: The Bubble-Free Installation Cheat Sheet
Your brand new phone is a masterpiece, but it takes only one microscopic speck of dust to turn your screen protector into a bumpy, bubbling eyesore. Achieving a perfect, seamless shield requires the right technique. To get a flawless, bubble-free finish, you must control your environment and align the glass with absolute precision. This guide delivers the ultimate strategy for an iPhone 17 screen protector bubble free install, saving you from the frustration of wasted glass and ruined aesthetics.
To secure a flawless, bubble-free application, clean your screen in a steam-filled bathroom to reduce airborne dust. Align the glass using tape as a hinge, peel the backing, and let the adhesive spread across the screen naturally. Push any remaining air pockets to the edges with a squeegee or a credit card wrapped in a microfiber cloth.
Why Bubble-Free Matters (More Than You Think)
Bubbles are not just cosmetic annoyances. Air pockets create weak spots where the glass can crack under pressure, compromising your expensive display. Also, trapped dust particles can scratch the glass beneath the surface as your phone moves inside your pocket. A clean application preserves touch sensitivity and keeps your screen looking pristine.
The Smartish Philosophy: Less Hassle, More Life
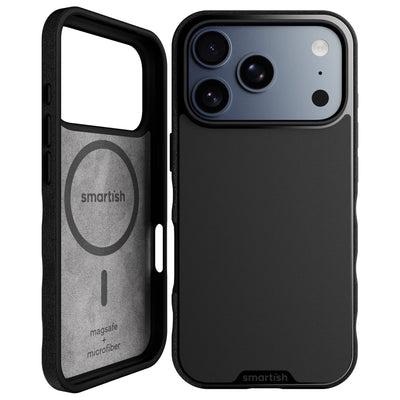
We believe everyday accessories should solve problems, not create new ones. Life is messy enough without wrestling with sticky plastic and stubborn air bubbles. Our design philosophy focuses on simple, clever solutions that work without requiring an engineering degree. Whether you are protecting a brand new device with a MagSafe slim case for iPhone 17 Pro Max or carrying your essentials in a crossbody wallet, we design gear that makes your daily routine smoother.
What’s Actually Inside That Screen Protector Box?
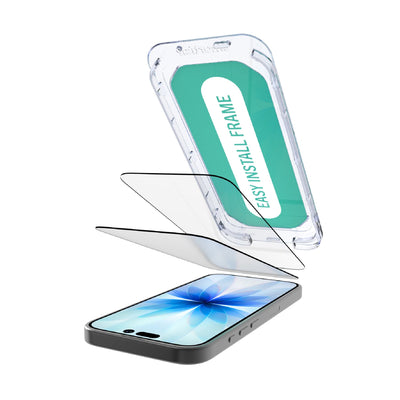
A standard high-quality kit contains more than just the tempered glass. Inside, you will find a wet alcohol wipe to dissolve finger oils, a microfiber cloth to polish the glass, and sticky dust-removal stickers. Some kits include alignment frames, while others rely on steady hands. Knowing how to use each tool in order is the secret to a professional result.
Smartish Tip: Never discard the dust-removal stickers. They are your best defense against tiny particles that the microfiber cloth misses.
The Pre-Install Power-Up: Your Secret Weapon Against Bubbles
Preparation is eighty percent of the battle when attempting an iPhone 17 screen protector bubble free install. If you skip the prep work, you are likely to trap dust, hair, or oil under the glass. Before you plug your phone into an iPhone 17 charger to power up, taking five minutes to set up your workspace beats throwing away a ruined protector.
The “Clean Room” Trick: Your Bathroom Is Your Ally
Airborne dust is the enemy of a clean screen application. To reduce the risk, run a hot shower in your bathroom for a few minutes until the room gets steamy. Moisture in the air clings to floating dust and pulls it down. This simple trick creates a temporary cleaner zone for installation.
Mastering the Microfiber: The Smudge-Free Wipe
Start by cleaning your hands thoroughly to remove natural skin oils. Use the wet alcohol prep pad to dissolve smudges, makeup, and grease on your phone screen. Next, polish the glass dry with the microfiber cloth, wiping in one direction. Avoid circular motions, which tend to move oil around instead of lifting it off the surface.
Dust Bunnies Beware: How to Erase Every Speck
Even after polishing, tiny invisible dust specks can land on the screen. Use the dust-removal sticker to gently dab the entire display. Peel the sticker up quickly to lift stubborn lint. Inspect the glass from a side angle under bright light to confirm that no speck remains before proceeding.
The Alignment Game: Getting It Right Before You Commit
Before peeling off the adhesive backing, rest the screen protector on your phone to check alignment. Line up the speaker cutout and the edges of the display. Getting a visual sense of the final position reduces mistakes once the adhesive is exposed.
The Hinge Method: Your Foolproof Path to a Perfect Install (No Tray Needed!)
You do not need an expensive plastic alignment tray to get a straight, centered fit. The hinge method uses household tape to create a swing-down door, helping you get a precise iPhone 17 screen protector bubble free install with less stress.
Why the Hinge Method Wins (Even Without a Fancy Tray)
Alignment trays can be bulky and may not hold the glass tightly enough. The hinge method locks the protector into the right position before you expose the adhesive. Once the position is set, you swing the glass open, clear any last dust, then swing it closed like a book cover.
Step-by-Step: The Hinge Method
- Place the screen protector on your clean phone screen with the protective backing still attached, aligning the edges.
- Apply two pieces of Scotch tape or painter’s tape to the left side of the protector, wrapping them around to the back of your phone to act as hinges.
- Swing the protector open like a book cover.
- Use your dust sticker one last time to lift any newly landed dust specks.
- Peel off the protective film from the adhesive side of the screen protector.
- Gently swing the protector back down, letting its own weight start the bond from the center outward.
- Press along the center line to push air toward the edges.
Troubleshooting Common Hinge Method Mishaps
If the tape slips during the process, lift the protector, realign it, and apply fresh tape. Press the tape firmly to both the glass and the phone body so it does not shift while you peel the backing film.
Beyond Bubbles: Smart Tips for a Screen Protector That Lasts
Once your glass is in place, keep it looking good with a couple of simple habits. A solid case-and-protector pairing prevents edge lift, and a gentle cleaning routine helps the protector stay clear without grinding grit across the surface.
The Case Compatibility Conundrum: Why It Matters
A screen protector that reaches the absolute edge of your phone can get pushed up by a tight case lip. That edge lift lets air sneak underneath and can create bubbles that keep coming back. A solid case-and-protector pairing prevents edge lift. Look for case-friendly protectors that leave a tiny margin around the perimeter, giving your slim case for iPhone 17 Pro room to grip without catching the glass.
If you love hands-free convenience, pairing a case-friendly screen shield with a crossbody option is a clean setup. The Dancing Queen - Crossbody Wallet Case for iPhone 11 Pro Max is designed for that model and includes an adjustable crossbody strap and a removable wristlet. It also secures up to five cards plus cash and has lip gloss loops for quick access.
What to Do When a Stubborn Bubble Refuses to Move
If you spot an air pocket after installation, do not use your fingernails, which can chip the glass edge. Use a squeegee or a credit card wrapped in a microfiber cloth to push the air pocket toward the nearest edge. For tiny bubbles without dust inside, wait twenty-four to forty-eight hours since some adhesives allow small air pockets to fade.
Should You Reapply a Dusty Protector?
Pros of Reapplying
- Saves money on buying a replacement kit
- May let you remove a single dust speck
- Gives you another shot at alignment
Cons of Reapplying
- Lifting the glass can flex and crack tempered glass
- Exposes the adhesive to more airborne dust
- Can reduce adhesion over time
When to Call It Quits: Recognizing a Failed Install
If you have multiple large bubbles caused by trapped pet hair or heavy dust, the adhesive layer is likely compromised. Trying to wash or scrape debris off the sticky side usually makes the problem worse. In that situation, discard the glass, clean your workspace, and start again with a new protector. A clean iPhone 17 screen protector bubble free install is worth the extra effort.
Frequently Asked Questions
How do I install an iPhone 17 screen protector without bubbles?
Getting a bubble-free iPhone 17 screen protector install is all about setting the stage. Start by creating a clean, dust-reduced environment, like a steamy bathroom. Then, meticulously clean your phone screen using the provided alcohol wipe, microfiber cloth, and dust-removal stickers. Finally, use the hinge method to align the protector precisely, letting the adhesive spread naturally, and gently push any remaining air pockets to the edges.
What's the best way to ensure no air bubbles get trapped under my iPhone 17 screen protector?
The secret to avoiding air bubbles is thorough preparation, which is eighty percent of the battle. We recommend running a hot shower to create a steamy bathroom, which helps settle airborne dust. After that, use the wet alcohol wipe, microfiber cloth, and dust-removal stickers to make sure your iPhone 17 screen is absolutely spotless before applying the protector.
What tools come in a typical iPhone 17 screen protector kit for a clean installation?
A quality iPhone 17 screen protector kit usually includes everything you need for a smooth install. You'll find a wet alcohol wipe to tackle oils, a microfiber cloth for polishing, and sticky dust-removal stickers to grab every last speck. Some kits even come with alignment frames, but our hinge method works great with just a bit of tape.
Why is a bubble-free application important for my iPhone 17 screen protector?
Bubbles are more than just an eyesore, they are actually weak spots. Air pockets can compromise the screen protector's integrity, making it more prone to cracking under pressure. Plus, trapped dust can scratch your actual iPhone 17 display over time, so a clean application keeps your screen looking pristine and fully responsive.
Can you explain the "hinge method" for installing an iPhone 17 screen protector?
The hinge method is a simple, clever way to get a precise iPhone 17 screen protector install without a fancy tray. You align the protector on your clean phone, then use two pieces of tape to create a hinge on one side, wrapping them to the back of your phone. This lets you swing the protector open to do a final dust check, peel the backing, and then swing it back down for a perfect, centered application.